E5 | Nashville Brick Cottage | Sustainable Siding
Season 46 Episode 5 | 23m 42sVideo has Closed Captions
Charlie visits a factory that makes rice hull siding, then installs it at the house.
Charlie Silva and Mark McCullough make a guest appearance. Charlie meets with sales director Chandler Delinks to learn about the process of making siding from rice hulls. Meanwhile Kevin O'Connor discusses an indoor panel upgrade with electrician Ricardo Hernandez. Later, Charlie and Kevin help homeowners Rachel and Adam put up siding. Mark begins brick repair for the home office.
Problems playing video? | Closed Captioning Feedback
Problems playing video? | Closed Captioning Feedback
Funding for THIS OLD HOUSE is provided by The Home Depot and Renewal By Andersen.
Support provided by:

E5 | Nashville Brick Cottage | Sustainable Siding
Season 46 Episode 5 | 23m 42sVideo has Closed Captions
Charlie Silva and Mark McCullough make a guest appearance. Charlie meets with sales director Chandler Delinks to learn about the process of making siding from rice hulls. Meanwhile Kevin O'Connor discusses an indoor panel upgrade with electrician Ricardo Hernandez. Later, Charlie and Kevin help homeowners Rachel and Adam put up siding. Mark begins brick repair for the home office.
Problems playing video? | Closed Captioning Feedback
How to Watch This Old House
This Old House is available to stream on pbs.org and the free PBS App, available on iPhone, Apple TV, Android TV, Android smartphones, Amazon Fire TV, Amazon Fire Tablet, Roku, Samsung Smart TV, and Vizio.
Keep Exploring


This Old House Insider Newsletter
Get This Old House exclusive stories, tips, and behind-the-scenes information delivered right to your inbox every month.Providing Support for PBS.org
Learn Moreabout PBS online sponsorshipKevin: Today on "This Old House"...
When it comes to siding your house, there are more choices than ever.
And you'll never guess what this is made of.
We'll show you how it's made, and we'll put it up on the house.
Then some familiar faces have flown south to help renovate this historic 1920s brick cottage.
♪♪ Man: Ah.
That's it.
♪♪ ♪♪ ♪♪ Mark: All right, Charlie.
Great flight.
Let's get the bags in the truck.
Charlie: Here's yours.
Mark: This is mine.
Charlie: Here's mine.
Mark: Oof.
You counting this as one?
Charlie: Hey, one of us came here to work, you know.
Mark: Geez.
All right.
Charlie: Throw that there.
Mark: That's okay.
Charlie: Thank you.
Right in there.
Mark: All right.
Charlie: Perfect.
I'll drive.
Mark: All right, Charlie.
I am so excited to be down here in Nashville.
I've never been.
Charlie: Me either.
And it's about time we got down here.
Country music, barbecue, and warm weather.
What's not to like?
Mark: All right.
This is gonna be great.
Let's step on it, Charlie.
Charlie: Uh, where are we going?
Mark: We're going to a 1929 brick cottage.
Charlie: Where?
Mark: East Nashville.
Charlie: Oh.
That narrows it down.
Mark: Hold on, Charlie.
Hold on.
Let me make a call.
♪♪ Kevin: Hey there.
I'm Kevin O'Connor.
And welcome back to "This Old House" here in Nashville, Tennessee, where we are working on this 1920s cottage on the east side of the city.
[ Cellphone ringing ] Excuse me.
Sorry about that.
Mark, what's up?
No.
I sent them -- I sent the directions to you.
It's in your inbox.
Your e-mail.
Just check that out.
All right.
Hustle up.
We're waiting on you.
Thanks.
I got to go.
I'm opening the show.
Sorry about that.
Anyway, East Nashville, Tennessee -- here we are.
We are working on this cottage for a young family of four who has asked us to give them some extra living space but to not change the footprint at all of the house.
So if you recall, the way we did that was to pick the house up, jack it up, roll it into the backyard, and then fly in these new, precast concrete panels -- 10 feet high.
Now that those are in place, the house is back.
And last time we were here, it was sitting just above the foundation by about a quarter of an inch on some steel supporting beams.
Well, you can see that those are gone now.
And these pockets where steel beams used to poke through, those are gonna get patched today.
If you look at the foundation down at the base, you can see our homeowners took it upon themselves to add a little damp-proofing right there.
You can see the windows are in.
And I'm told that tomorrow the foundation will get some backfill.
If you come down here to the back corner of the house, you can see where else we picked up some new interior space.
So first floor with the brick and then up top -- That's a new dormer put off of what was basically an unused attic space.
Now we've got three bedrooms, two bathrooms up there, a lot of extra space.
Porch off the back and then down below, this beautiful walk-in basement.
Mark: Charlie, out here, take a right.
Charlie: You think we have time to get some cowboy boots?
Mark: Ooh.
I like that.
All right.
I'm gonna find out exactly where we're going.
Go to the left.
Kevin: When you come into the basement, you're gonna enter into what I guess is sort of a utility room right here.
So the slab has been poured, and the homeowners have dyed it.
They've chosen a charcoal-gray color, 'cause this is actually the finished look.
And this is gonna be a hard-working room.
There's gonna be a toilet right underneath here.
There's going to be a sink right here.
And then they've got a washer and dryer right here.
So sort of a mudroom entryway.
As you come through this doorway and back into this corner, this is gonna be a safe room.
Now you may recall just before our homeowners moved into the house a couple years ago, there was a tornado that came through town.
There was damage to trees out front, the roof here on the house.
And so they have opted to protect themselves against future tornadoes.
There is rebar that is set into the slab and then they'll put concrete block over these, fill them.
The rebar will be continued up, as will the block.
And then there will be a roof, a sort of ceiling to this room.
And right in this area here, a steel door so you can close it, get in there, and you can be safe.
But check this out.
Do you remember what this old basement used to look like?
Low ceilings, not a lot of usable space.
Now, with the 10-foot-high precast panels on three sides, we've got high ceilings, and we're gonna end up with about 1,200 square feet of usable space -- almost twice what was used to be here.
This little corner here will be our mechanical room.
Ricardo, how you doing?
That's our electrician.
I'm gonna meet with him in a little bit.
As you come through here, we've got a staircase.
And from this back door, you can go right up to the first floor.
♪♪ Charlie: Hey, co-pilot.
Are we close?
Mark: Uh, yeah.
Yep.
We seem close.
I think so.
You know what?
Pull over right here by these trucks.
Charlie: Sounds good.
Hi there.
I'm Charlie.
This is Mark.
Mark: Hi.
Charlie: We're here to get to work.
Where do we park the car?
Javier: You must be looking for Kevin.
Charlie: What gave it away?
Lyn: Oh, just a little something gave it away.
You can park in front of the truck.
Charlie: Thank you.
Kevin: Up here on the first floor of the house, we used to have three bedrooms.
Those have now been moved to the new second floor.
We got a dormer so they fit up there.
You can see we got a new staircase going up there.
You can also see that we've got the rough electric in -- plumbing as well.
We're gonna get some rough inspections on those.
There used to be a full bath right here.
That came down, and now we've got a big, wide-open room.
This is gonna be a new dining room.
You can imagine sitting at the dining room table.
And now you get to look out through these double sliding doors.
Beautiful vistas to the backyard and a porch that runs the length of the back of the yard.
This big, open space is gonna have a kitchen right here.
So we get the open floor plan here on the first floor.
Oh!
It's Lewis and Clark.
You guys made it.
Mark: At your service.
Charlie: You ever doubt us?
Kevin: No, no.
No, never doubted you.
It's only one road.
But anyway, we're glad you're here.
Lots to do.
Charlie, I think we told you a siding job.
So we're gonna ask you to dig into that one.
Mark, we got some brickwork inside to do.
Maybe you guys familiarize yourself with that.
And I've got an electrician to meet, a plumber to meet.
So we'll get back to you.
Mark: All right.
Kevin: Let's go.
Break.
Hey, Ricardo.
How you doing?
Ricardo: Hey, Kevin.
All good.
How are you?
Kevin: I'm all right.
I saw an electrical inspector running around.
How'd we do?
Ricardo: We did great.
We have our green tag.
Our electrical rough-in is approved.
Kevin: Congrats.
All right.
And what did you rough in for us?
Ricardo: We have a 200-amp service.
This is our indoor panel.
Kevin: And 200 amps is up from what originally?
Ricardo: It was 125 previously at this property.
Kevin: A little bit of upgrade.
Wow.
You do neat work.
I like that.
Ricardo: Yes, sir.
We try to keep everything organized from lower loads to greater loads.
Kevin: So the lighter loads on the left.
Ricardo: Yes, that's our white wire, which we will be using for, like, regular bedrooms, lighting, outlets, and stuff.
Kevin: So the lowest load.
On the right-hand side, you get the yellow wires.
Higher load over there?
Ricardo: Yep.
For kitchens, bathrooms.
Kevin: Very nice.
In the middle, we've got the orange -- yet an even higher load.
Is that right?
Ricardo: Yes, sir.
That's 30, and it's for our dryer.
Kevin: Now that the rough-in is done, where are you off to next?
Ricardo: My next step will be my outdoor service.
This is our 200-amp meter.
Kevin: Oh.
So meter socket, obviously, with its own box.
Although you've got an adjacent service panel, which I've not seen before.
What's this about?
Ricardo: It's best for our exterior equipment.
In this property, they actually requested an EV charger.
We have this wiring already here, prewired.
And it's gonna have its own breakers, and we'll be able to shut it off outside without bothering our indoor equipment.
Kevin: So utility power comes in through the meter, passes through this box, and then jumps to the inside.
Ricardo: That is correct.
Kevin: Very nice.
And where does this end up?
Ricardo: This will be ending up three foot from the corner of the house, 5'6" from the last grade level.
Kevin: Oh.
All right.
Well, we're getting backfill tomorrow, so I think you're in luck.
I think final grade is gonna be set tomorrow, which means you'll know where this goes.
Ricardo: Yep.
That's the plan.
Kevin: Awesome.
Thank you, Ricardo.
Ricardo: Thank you.
♪♪ Kevin: When it comes to siding, there are a lot of options out there, each with their own pros and cons.
You can go with wood, vinyl, stone, stucco, fiber cement, metal, or even rice.
Yep, you heard that right.
This siding right here is made out of rice hulls.
That's the hard outer layer to the grain of rice.
And before we put it up on our building, we sent Charlie down to Mississippi to see how it's made.
Charlie: Hey, Chandler.
Chandler: Hey, Charlie.
Charlie: Nice to see you again.
Chandler: Thanks for coming.
Charlie: I've used this product before, and I like working with it, but I really want to see how it's made, so walk me through it.
Chandler: Sure.
Absolutely.
Very few people understand that the US is actually a net exporter of rice.
We export over 20 billion pounds of rice every year.
Charlie: I didn't know that.
Chandler: Every grain of rice actually is covered in a rice hull, which you see a pile of here.
The rice hull protects the rice grain from water, weather, pests -- everything that we want an exterior building material to do.
So whenever they get an order from the co-ops or the rice farmers to export some of this rice, they have to actually shake off the rice hulls, and that gets thrown in the landfill.
They might use it for animal bedding, and it takes a really long time to break down.
So we've found the perfect use for that material, for the rice hulls, by using it in our material.
We take these rice hulls and we incorporate -- More than 50% of the composition of this material is actually the rice hulls right here.
You're welcome to reach in here and grab ahold of them.
Charlie: So it's very light, almost looks like little grass seed, actually.
So what's the process from here?
Chandler: What we do with this rice hulls is we take them, we receive them, and we're gonna bring you the next step of the manufacturing process.
Charlie: Great.
Lead the way.
Wow.
So this is it.
Tell me how it works.
Chandler: Yeah.
So all those rice hulls that we saw outside in their raw form are brought into this room and fed into a hopper that feeds down into the grinder.
So this grinder will grind those rice hulls up to a specific particle size.
Then they'll get fed up to a sifter that you see up there sort of shaking.
What that does is separates the usable particles from the nonusable.
The usable particles continue down the line, and the nonusable will come back into this grinder until they reach the usable particle size.
And then they'll move forward in the manufacturing process.
Charlie: So really everything is used.
Chandler: Yes, absolutely.
Circular manufacturing here.
Charlie: Nice.
Chandler: Right here, it's coming out of this hose.
That's the actual finished product compared to the original.
There's your rice hulls before grinding and after grinding.
Charlie: That is some fine stuff, I'll tell you.
Chandler: Yeah, absolutely.
And so -- so what happens now is we're gonna take this product.
And what that does is leads us to the final step of our compound manufacturing process, which is in this next room, right over here.
All right, Charlie.
We're entering the mixing room, at the blending room, now.
We took the rice hulls.
We've got them in our super sacks here.
We're gonna bring them over to this mixing station here.
We're actually gonna take all the other ingredients that make up our material, and we feed them into our mixers, where we'll take all those ingredients, blend them together, and make what's called a dry blend.
Charlie: How many ingredients are there?
Chandler: There's close to 20 ingredients in the manufacture of this material.
This is where I talk about us being bakers.
This is where we have the pancake mix, before we add the milk and eggs.
The next station we're taken to is where we start to actually make the candy.
All right, Charlie.
Here we are at the actual extrusion.
And what's gonna happen is our material now, that dry-blend powder is gonna come out almost like a taffy.
We're gonna introduce some air to it, and it's gonna run through these calibration tables.
And what we'll be left with is actually the sheet-good form of the material that will then be turned into our product.
Charlie: I want to see how that cutting works.
So this is really being slowly fed through this table.
Chandler: Yeah.
You've got, like, a push/pull balance that runs the material from the calibration through these rollers, and where it's coming to next is right here, underneath these brushes.
There's actually two circular blades that are trimming the edges off the board.
As it runs through, you can see the material is still sliding.
In this box right here, we actually have a cross cut.
And then that material is now ready for the next step of the process, which is gonna be in the finishing station that we're gonna look at, which is basically the final dressing on the product.
Charlie: What about all these cut-offs here?
Chandler: Yeah.
Great question.
That is the scrap we would bring back around that I mentioned earlier, which is the regrind process.
So again to the circular manufacturing, the closed-loop manufacturing, we're gonna take that scrap, we're gonna regrind it, and we're gonna reintroduce it into the virgin compound.
And it's gonna go right back to the extruder, and it's gonna become new material.
Charlie: Nice.
Chandler: All right, Charlie.
We are now in what we call the finishing phase of manufacturing this product.
Charlie: So you'd make 1x8 boards, and then you start making your siding.
Chandler: Exactly.
So the 1x8 board, which is an actual 7 1/4 inches width, then goes to the final step of the process, which is the molder.
It's a traditional wood molder, where we'll take that through and then we'll cut the profile into it.
This thing, after going through the whole process, looks like a piece of wood but performs like a composite.
So it's stainable or paintable, but you don't have to prime it.
It can sit in the dirt.
It can get wet.
It's moisture-resistant, rot-resistant.
Charlie: I know it's not wood, but it does look like wood.
Especially when you get some paint or stain on it.
I know we took delivery in Nashville, and I have to help them put it on, so I have to get back.
I can't thank you enough for the tour.
I learned a lot.
Chandler: Thanks for coming.
Really appreciate it.
♪♪ Kevin: Charlie, who knew they could make siding out of rice?
Charlie: Amazing.
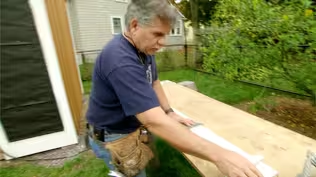
Kevin: What do we need to know in terms of installation for the siding?
Charlie: Well, what's really cool is this here was ordered from the factory.
And what's really nice about this trim piece -- We ordered it with a rabbet in it.
This is 5/4 material, and the rabbet's 3/4" in depth.
Kevin: So this is our corner board, you're saying.
And when it lays here, that rabbet is gonna give us a little slot behind it, either side, to slide it in.
Charlie: That's right.
You always still want to leave an expansion and contraction with siding.
Kevin: Oh, yeah.
If you push this all the way left, we got about half-an-inch opening there.
Charlie: It's still covered if it was ever to go all the way.
It's not gonna pop out and show a seam.
Kevin: And then that comes down.
Before you come down, I want to look at your screw pattern We're screws, right?
Not nails.
Charlie: These are screws.
Each screw always goes into a stud every 16 inches on center.
And the bottom screw goes in two inches off the bottom, and it will have a plug that's made out of the same material.
Kevin: So this top screw gets hidden when the next board comes down and over it.
So that leaves you with a nice shiplap detail.
This one is hidden.
This one's exposed until you bung it.
And behind it, you've got a house wrap because the manufacturer requires it.
Charlie: This is not required by the manufacturer, but this is something we love to do.
This is a drainable wrap, and believe it or not -- See these little dimples in here and all that?
Kevin: I don't see them, but I can feel them.
Charlie: It just keeps the siding off just a tick, really lets air movement behind the siding.
Kevin: So you're gonna get drainage and air flow for drying?
Charlie: Sounds like you're doubting me.
Kevin: It does look a little tight.
Charlie: I agree.
It does.
But check this out.
Kevin: Oh, you're gonna prove, huh?
Charlie: Watch it come right out the bottom.
Kevin: This is gonna be so good if it doesn't -- Ah.
Look at that.
I already lost.
[ Laughs ] Charlie: See that?
Kevin: There's our water down there.
Good system.
All right.
Well, we've got some helpers here, so we're ready to help you install.
Charlie: The homeowners, Adam and Rachel, are here and they are to help, so I say we divide and conquer.
Why don't you and Adam cut, bring it out to Rachel and I.
We'll start installing, Kevin: I'm game.
Let's do it.
Charlie: So we have the first one on.
We already put our screws in.
And all these pencil lines, you're gonna hit all of these 'cause these are all of our studs that we've already marked on the drainable wrap.
Rachel: Mm-hmm.
Charlie: I'll keep marking these.
And you can put the screws in the bottom ones, which are two inches off the bottom of the course.
♪♪ That's right.
♪♪ That should be lining up so you have the space where that piece of trim is also.
[ Drill humming ] All right.
Why don't we show you how to put some bungs in?
So let's start down here.
You gonna take it and you're gonna line it right up and then tap it.
And now pull this right off.
You see it?
Now tap it.
Keep going.
Pretty good.
You can see we have the rabbet right around the side of the window trim.
Along the bottom piece of trim, we actually dadoed this ourselves with a saw.
So that way it'll hide all of our cuts.
This one might be a little challenging to put in.
Start down a little low.
Kevin: And...I'm in.
Charlie: Back to you?
Kevin: Yeah.
Charlie: So what do you guys think?
Adam I like it.
It's easy to work with, and it looks great.
Rachel: Gotten the hang of it.
Thanks for your help.
Charlie: Well, you guys really picked up on it fast.
And with Javier, Lyn, and both of you, I think you have this under control.
I would love to stay, but I have a plane to catch.
Adam Thanks for helping.
Rachel: Thanks for coming.
Charlie: It was really nice to meet you guys.
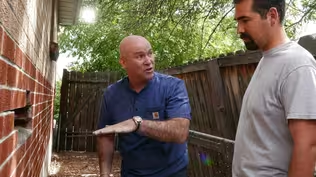
♪♪ Kevin: All right.
Mark, you found your assignment.
Mark: Hey, Kevin.
Kevin: This is a little different than when we first found this house.
When I got here a couple months ago, this was being used as a primary bedroom, and it was wrapped in paneling all around.
But not originally a bedroom, as I think we learned.
Mark: Exactly.
Originally sleeping porch, which was common back in the day.
Kevin: Right.
Mark: And they love the brick.
Kevin: So this would have been exposed when this was a sleeping porch.
This would have been, like, screened in?
Mark: Screened in.
But this brick was exposed.
Kevin: You discover brick, and the homeowners fall in love with it.
They always want to keep it.
And they want to keep this?
Mark: They do, although they do want to fix it up a little bit, but they don't want me to go crazy because they do love that rustic look.
Kevin: So what's on the list of things to do?
Mark: So a few things.
As you look around, Kevin, you can see some of the mortar is a little bit punchy, some of it's missing, some loose brick that I'm gonna replace.
But one of the most important elements is right above your head.
This is what we call a soldier course, as you know.
In this spot over here, you can see that doorway.
That's where we're gonna put another soldier course in.
Kevin: And what happens here?
I presume that's an old exterior window.
Are you gonna fill that in?
Mark: Not me, but they're gonna bring a carpenter in.
He's gonna make some shelving.
You can see the indentation, okay?
So they're gonna pad that wall out.
That's gonna become plaster.
Kevin: So shelving here, plaster up top.
Mark: Yep.
That's the old chimney.
We're gonna keep that brick, again.
They wanted to stay with the character of rustic.
Kevin: Doesn't match, but they're okay with that.
Mark: Yep.
They're okay with that.
And as you go to the left of that, we're gonna pad that wall out.
That's gonna be plaster to match over here.
Kevin: So actually not too much brickwork.
A lot of these voids aren't gonna be filled in with brick.
Mark: A lot of repair, as we say.
So again, we have to work with what we have.
I don't really like that because some of the walls aren't, you know, quite plumb.
Some of them are crooked.
Kevin: We didn't bring you here for your vote.
We just brought you here for the trowel.
Mark: And when in Rome, I'm gonna be a Roman.
Kevin: Good.
Mark: So we'll get it done.
Kevin: Are we starting there?
Mark: Over this way.
Yep.
Kevin: Let's get to it.
You guys start off with the steel angle iron here.
Mark: Yep.
This is the steel angle iron.
That's gonna carry our soldier course from this end to that end.
Brick, Kev?
Kevin: Yes.
There you go.
Mark: Thank you.
Kevin: So, Mark, right underneath that -- and I mean underneath the steel as well -- what is that, a filler?
Is that wood or is that a little thin slice of brick?
Mark: So, Kevin, a few minutes ago I said, "When in Rome, become a Roman."
This wall actually comes around the corner from the main part of the house, so it's a structural unit, so I have to leave it in.
I don't have a lot of room to do this, so I actually had to put in a piece and then level off my angle iron and then continue the soldier course.
Kevin: When in Rome.
Mark: Be a Roman.
Kevin: Next one.
Mark: Thank you ♪♪ ♪♪ ♪♪ In the masonry world, this is what we call a trig.
As you can see, the back of the trig has a little space for my line.
I'm actually gonna hook that onto my line.
I'm gonna flip it onto the brick.
I'm gonna weigh the trig down with another brick, like that.
And as you can see, it's created a straight line.
That way, I don't have to use my level for every single brick.
♪♪ ♪♪ Mark: All right.
Last brick, Kevin.
Kevin: Look at you.
Mark: Now you can really see what the string line did for me.
All right.
I have a flat soldier course.
A flat wall here.
When I ran the line, kept it flat and straight.
Kevin: So the only question I have left, Mark, is you've used the existing bricks.
You get a nice match there.
Mark: Right.
Kevin: I know you're particular about trying to match the mortar.
Mark: Right.
Kevin: It doesn't.
This is a lot darker than what's here.
Mark: Right.
Kevin: You must have an answer.
Mark: Right.
So don't forget, Kevin, this mortar is wet.
So it's gonna lighten up.
Now, this field has six, seven, eight different mortar colors.
I have to pick the most prominent one.
So I have a little mason's trick.
You can see this trowel.
This is the wet mortar right here, which looks exactly like the mortar we just put in.
But the rest of the trowel, the mortar is dried, and if you compare it to the existing joints... Kevin: It's a nice match right there.
Awesome.
Well, nice job, Mark.
We love having you down here.
I know the homeowners are very appreciative, so thanks.
Mark: All right.
Thanks for having me down here.
I hope I didn't string you along.
Kevin: Oh, my God.
Mark: Hey, I had to.
I had to.
Kevin: You've been hanging out with Pops?
Mark: Well... Kevin: I'd ask Mark what he thinks of Nashville, but he's still working inside.
How do you like it?
Charlie: I love Nashville, and you know what?
I can't wait to come back.
Kevin: Oh, look at that.
Nashville's got another convert.
Maybe two.
Lyn: There you go.
Kevin: All right.
So some good progress this time.
What's coming up next week?
Javier: We hope to get that siding done next week.
Kevin: Very nice.
Lyn: Yeah.
Then we're gonna move inside.
We've got insulation coming, drywall, and then we're gonna work on that safe room wall.
Kevin: All right.
Well, lots to come.
So until next time, I'm Kevin O'Connor... Charlie: I'm Charlie Silver.
Lyn: I'm Lynn Bowman.
Javier: And I'm Javier Gutierrez.
Kevin: ...for "This Old House" here in East Nashville, Tennessee.
Kevin: Next time on "This Old House"... Vince: Tommy, what's coming up today on "This Old House"?
Tom: Well, you, Mr. Vince Gill, are gonna give me a tour of Nashville.
Vince: Let's go inside.
You got to see the old place.
Tom: Okay.
I want to.
Vince: It's really great.
Tom: I love these old diners.
Kevin: Is this drain line pitch perfect?
We'll find out.
♪♪ And the homeowners have narrowed their exterior-paint choices down to three, and today they make a decision.
That's next time.


Support for PBS provided by:
Funding for THIS OLD HOUSE is provided by The Home Depot and Renewal By Andersen.